Aperture

The numerical value of the aperture shows the ratio of the hole diameter to the focal length of the lens (we wrote about it in the previous issue). This value is called the lens aperture. The lower this value, the more light passes through the lens. It must be said that the depth of field depends not only on the aperture value, but also on the focal length: the larger it is, the shallower the depth of field at the same aperture value.
Objects in the frame are completely sharp in all shots. This means that space is sharp throughout the entire depth of the frame. This effect is obtained when the following conditions are met: the aperture is as closed as possible and the use of a wide-angle lens (or zoom value).
So, in order for all objects in the frame to be sharp, close the aperture further and choose, if possible, a shorter focal length. But there are situations when it is necessary to highlight some object against a colorful background or among other objects. In this case, on the contrary, we open the aperture as much as possible and select a long-focal lens (the meaning of a variable focal length lens, zoom) (2 photos with different depths of field).
Background objects are out of focus and blurry. This effect is often used in artistic photography in order to emphasize the essence of the frame. This is achieved by opening the aperture as wide as possible and using a long lens (or zoom value).
In the previous article it was said that to obtain high-quality photographs you need to use low sensor sensitivity. But when the aperture is closed, little light enters the aperture, so a long shutter speed is required for proper exposure. To avoid camera shake when pressing the shutter button, put the camera on a tripod and set it to a long shutter speed; This feature is available on all professional cameras and on most point-and-shoot cameras.
“Correct” light
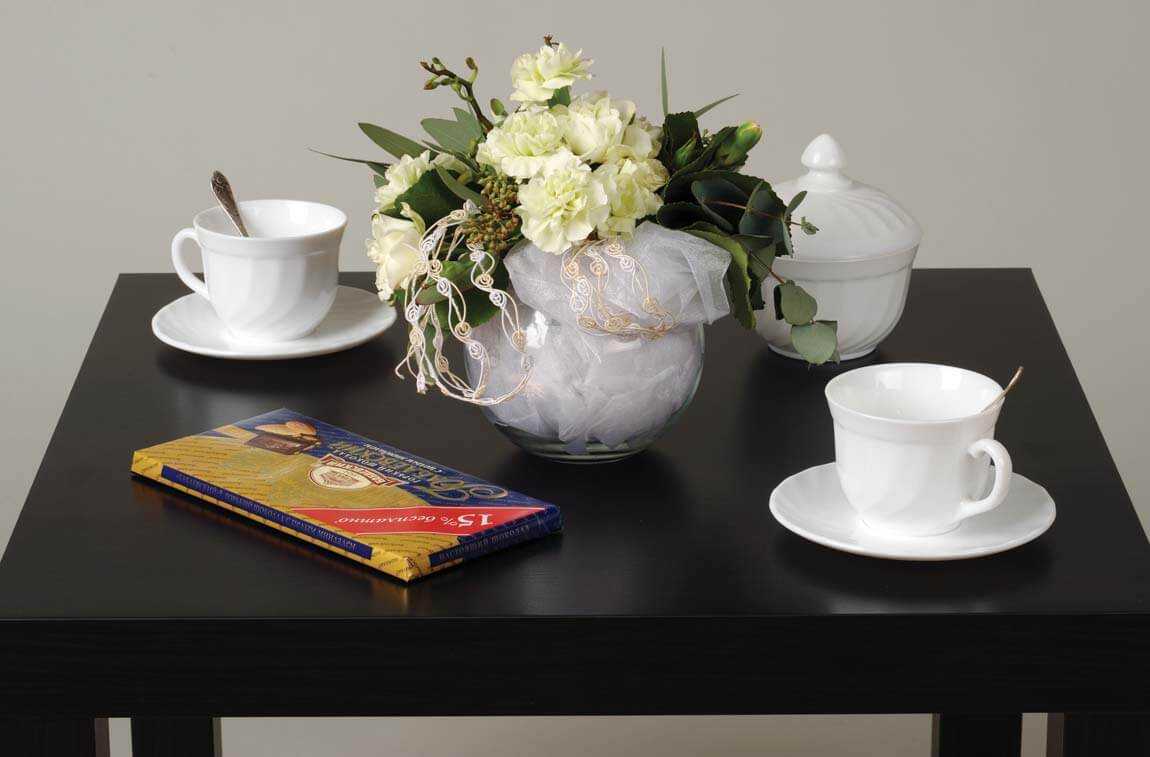
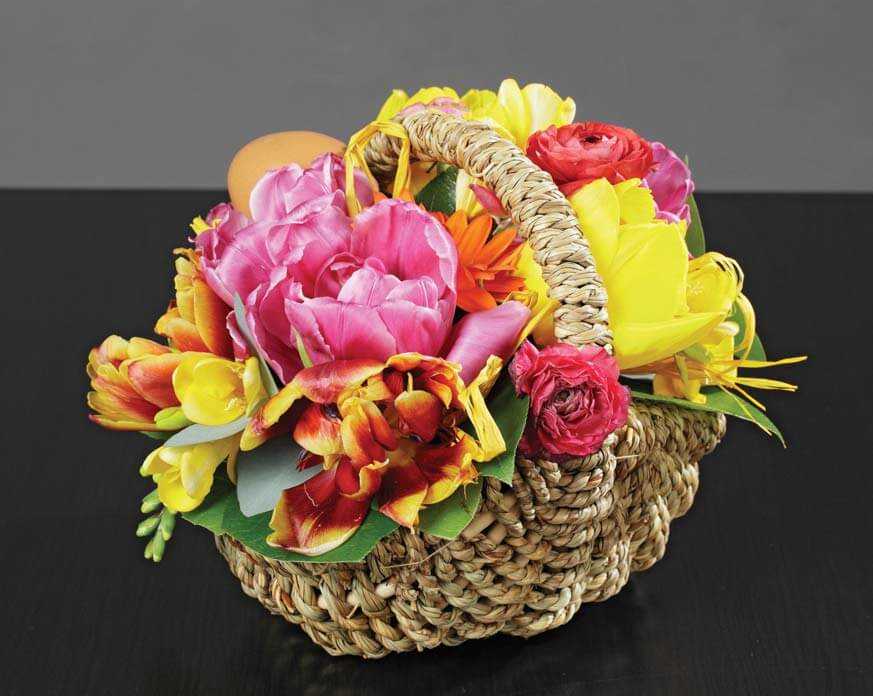
In the first photograph (Fig. 1), the composition is illuminated by a single light source located to the left of it at an angle of 45°. This lighting angle produces distinct, but not excessive, shadows, and the placement of the light source to the left of the subject is perceived more naturally by the person. Such a source imitates sunlight, creates a beautiful light-and-shadow pattern and is called drawing. But the frame also shows that only one side of the composition is illuminated, and on the basket, which remains in the shadow, the details are indistinguishable. This shot cannot be called successful.
Some tips
• To enhance the volume of the image, choose a background that contrasts with the main tone of the subject.
• When using natural lighting, you can illuminate an object from behind by placing it in front of a white or light-colored wall.
The main thing about the background
Sometimes an elegant bouquet cannot be seen in all details in a photograph: details are not visible, and the bouquet itself merges with the surrounding objects. What is the reason? It’s very simple: the photographer chose the wrong background or even forgot about it.
The background is the background. His choice must be approached very responsibly. The integrity of the image depends on the background; it can emphasize the merits of the work or, conversely, negate all efforts. If you select the wrong background, your work will be lost.
How to choose the right background? What criteria should be followed when choosing it?
If it is necessary to show a flower arrangement, then the background should be uniform. Only against a homogeneous background will the details of the work be visible, especially small ones, and the composition will not merge with anything. In addition to the background, you need to remember about the lighting.

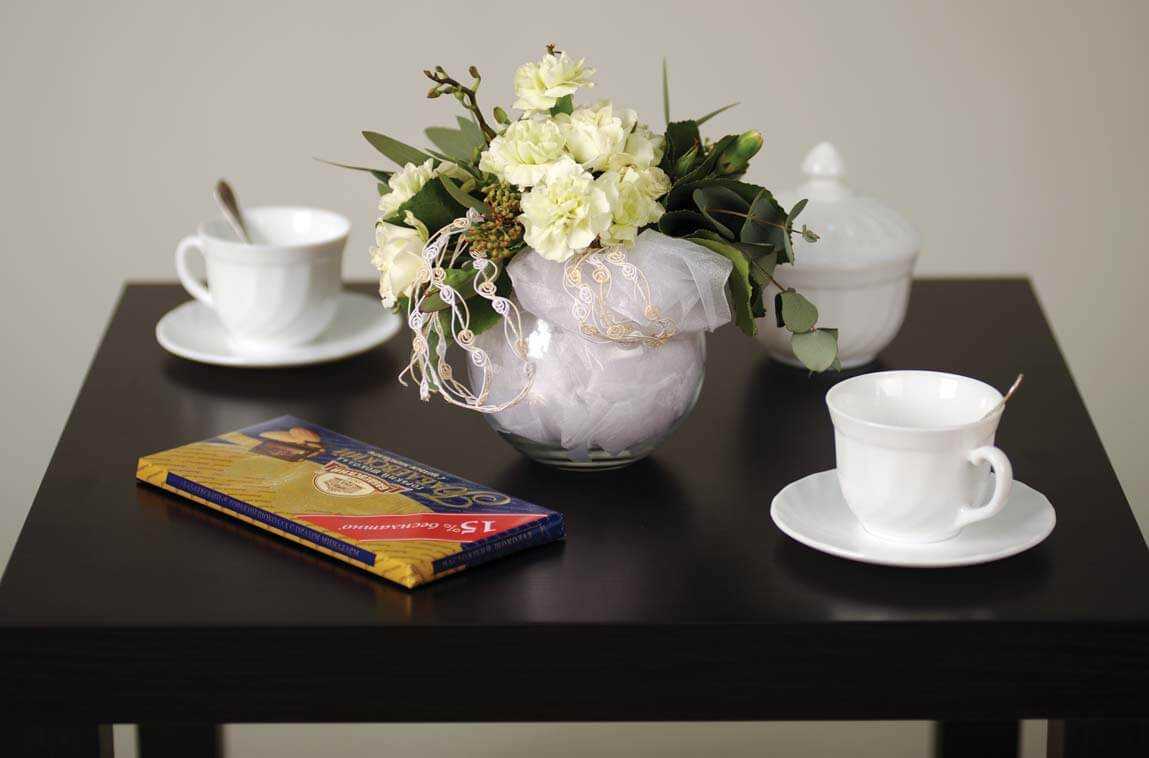
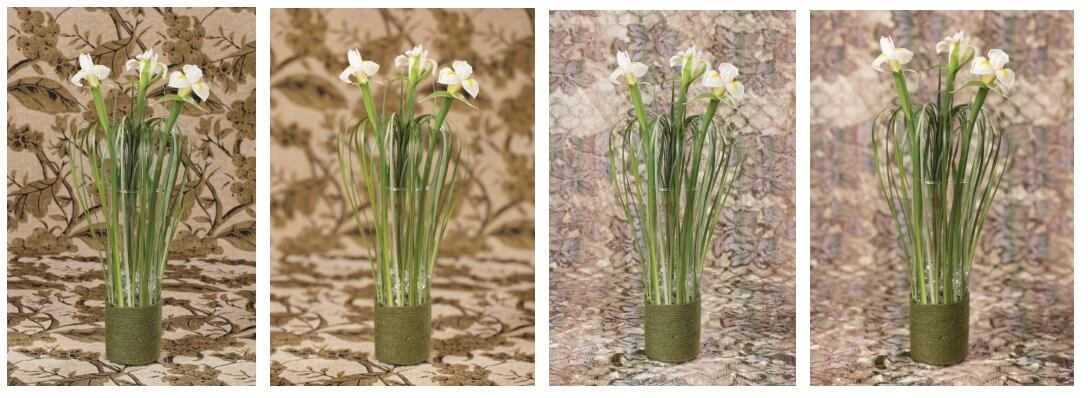
A neutral background is suitable for almost all works – white, gray, black (Fig. 1, 2, 3). The exception is when it is necessary to emphasize or even enhance the main tone of a bouquet or composition.
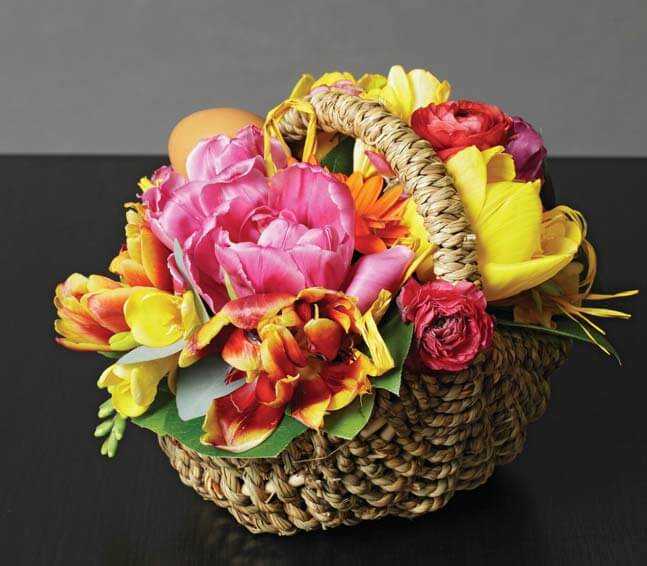
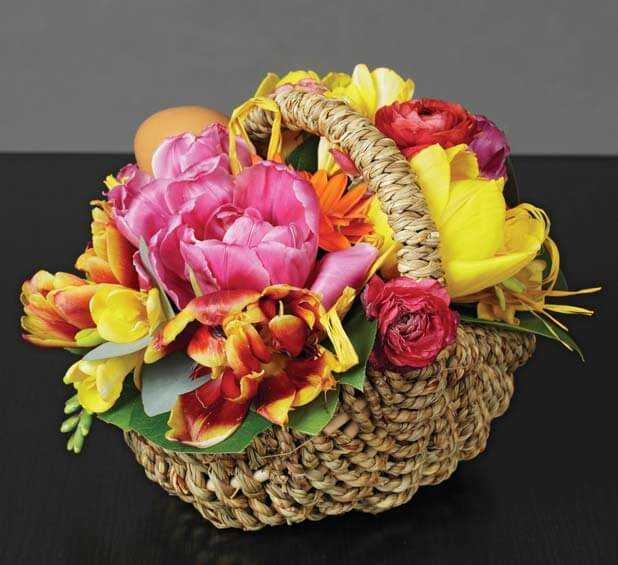
The motley background distorts the perception of the flower arrangement, its details merge with each other. But sometimes the photographer does not have the opportunity to choose the background himself, and an exquisite bouquet, which certainly needs to be captured as a keepsake, flaunts against a colorful background. What to do in this case? You can highlight a subject by opening the aperture. We wrote about this in one of the previous articles. This will “blur” the background behind the bouquet, make it more uniform, and the flower arrangement will become clearly visible. Backlight can also help, which we also already wrote about (Fig. 4, 5, 6, 7).
Another important rule: the background must be contrasting so that the details of the subject are not lost. For example, a white bouquet looks better on a gray or black background. The greater the contrast, the more expressive the object, but everything, of course, should be within reasonable limits. What can serve as a background? If you have a choice, it is better to prefer a paper background, because the structure of the paper is the most uniform, and its surface optimally reflects light.
You can use other homogeneous surfaces, preferably matte, to prevent the appearance of glare that will interfere with the perception of the subject. The background can be a concrete wall or fabric without a pattern or texture. They are great for photographing flower arrangements. Little photo secrets like these improve the quality of the photo.
There are different angles
One of the most important components of photography is the angle, namely the shooting point at which the shape of the object and its details are best conveyed in the frame. Choosing the right shooting angle is just as important as setting the light and choosing the background.
A common mistake when photographing bouquets is choosing the top shooting point. In this case, volume is lost and sometimes it is impossible to determine whether the bouquet in the photo is a composition. When depicting a bouquet, it is important to show the stem in the photograph, and the composition – a vase or basket. In addition, a person looks at all bouquets from the side and slightly from above, although it is more common to look at flowers at an angle of 45°. The photographer’s task when shooting is to find a compromise between these angles. This is where the shape of a bouquet can come to the rescue.
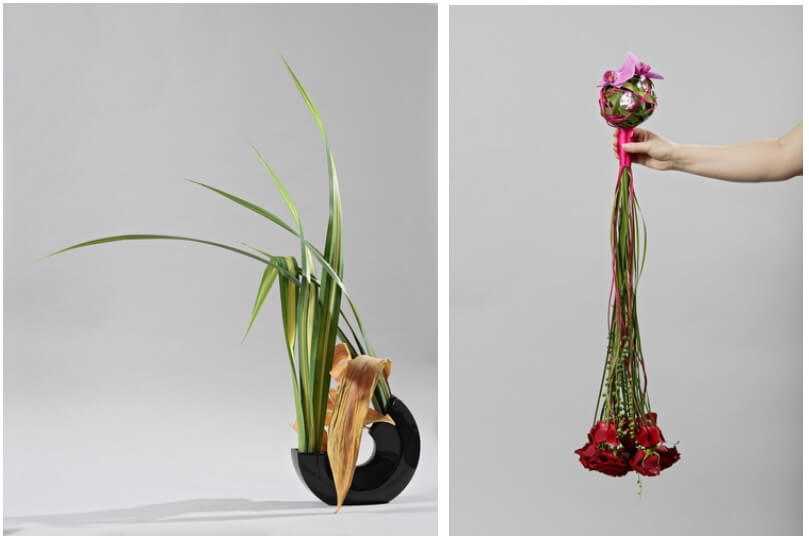
The most “grateful” in this regard, of course, is the shape of the ball. It can be filmed either from a strictly perpendicular (side) angle or at an angle of 45°. An elongated, hanging, or drop-shaped bouquet looks better if taken from the side or from a higher point. In this case, the shape and details of the bouquet are better visible. Flat bouquets should be removed strictly at an angle of 45°, compositions in baskets – at an angle of approximately 20°. Another nuance when photographing flowers in a basket: it needs to be rotated 15-20° so that the handle and shape of the composition are clearly visible.

If you photograph a bouquet not in a round vase, but in a square or triangular one, then slightly unfolded objects will also look better in the picture, so that the area of the visible edges is different. Separately, it should be said about photographing ikebana: classic ikebana is photographed from the side so that the surface of the water is visible in the photo. These simple rules will help you take great shots.
In the frame – the bride’s bouquet
What is the word “wedding” usually associated with? Most probably have a bride in a white dress with a light veil and a beautiful bouquet. Everything in this image is symbolic, and the bouquet plays an important role here.
A wedding bouquet is an integral part of the bride’s decoration, an important accessory that is selected individually. It cannot exist separately, like an ordinary composition, which means it will look better in the photograph in the hands of the bride or against the background of her dress. As a rule, the bride’s bouquet is complemented by a boutonniere for the groom; they can be captured in one frame, but in this case the photograph will resemble an ordinary wedding portrait (Fig. 1). Since the bouquet usually takes up only part of the frame, this option is suitable for printing a large-sized photograph to show the harmony of the floral decorations of the wedding dress.
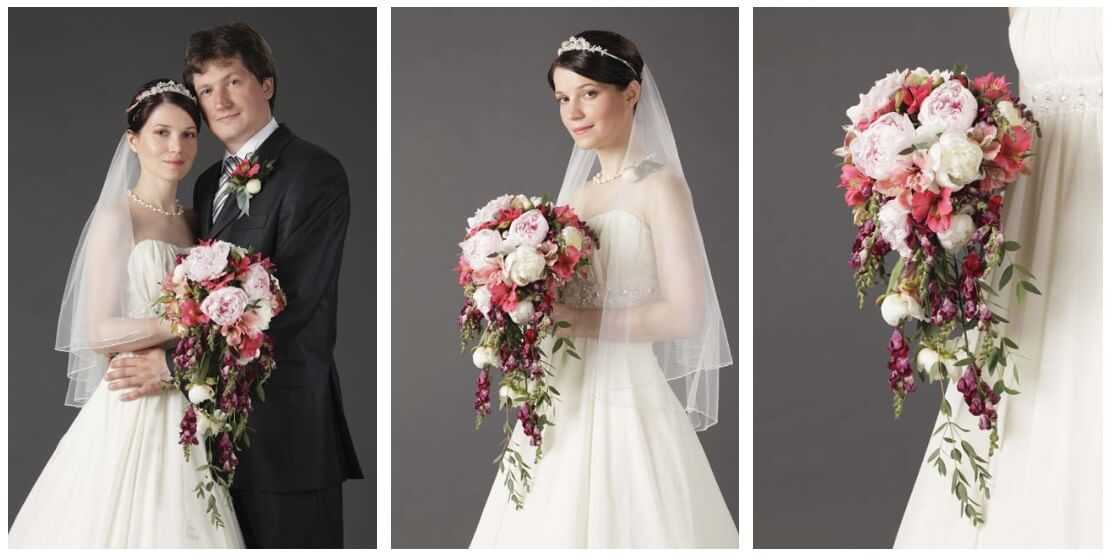
1. If the bride’s bouquet is COMPLETED with a boutonniere for the groom, they can be captured in one frame.
2. For CASCADE bouquets or bouquets OF LARGE FLOWERS, it is better to choose shooting at 3/4 human height.
3. When shooting a bouquet close-up, leave a MINIMUM MARGIN around, placing the object in the frame UNDER A SMALL TILT so that the shape is readable.
For cascading bouquets or bouquets of large flowers, it is better to choose shooting at 3/4 human height, especially if the bouquet complements the decoration on the neck (Fig. 2). Just like in the first case, this image looks good in a large format.
When shooting a bouquet close-up (Fig. 3), leave minimal margins around, placing the object in the frame at a slight angle so that the shape is readable. In this case, the edge of the bride’s dress looks good as a background. To prevent the light parts of the bouquet from blending into the dress, you can use a contrasting background. This option is suitable for a catalog, since the details of the colors are best visible, but it is not suitable for a cover or screensaver, since it has little artistic value.
To create an artistic photograph, you may have to “sacrifice” part of the bouquet (Fig. 4). To prevent the bride from “drawing” attention to herself, it is better to ask her to direct her gaze to the bouquet.

4. In artistic shots, the bride’s LOOK should be directed at the bouquet, so as not to “draw” the viewer’s attention to herself.
5. To separate a bouquet of small flowers from the background, OPEN the camera’s APERTURE wider. This will “blur” the background.
6. It is enough to set MORE CONTRAST LIGHTING so that the light bouquet does not merge with the light background.
If the bouquet is small and made of small flowers (Fig. 5), it should be separated from the background by opening the camera aperture, and the bride should be invited to hold the bouquet on her arms extended towards the camera lens. In this case, everything except the bouquet will be blurry, but the mood of the bride will be conveyed. A delicate, light bouquet looks very beautiful against a light background (Fig. 6). To prevent it from blending in, it is enough to set more contrasting lighting.
A little about the composition
The subject of photography must be placed in the frame not in the center, as novice photographers usually do (Fig. 1), but slightly to the side, at the so-called stress points. The fact is that the center of the frame is not the center for perception by the human eye. Looking at the “picture”, the human eye glides along four points, points of tension, or perception, located at the intersection of two vertical and two horizontal lines dividing the frame into equal rectangles (Fig. 2).


1. The subject of photography does not always look impressive when it is IN THE CENTER of the frame.
2. Diagram showing the location of STRESS POINTS in the frame plane.
If the desired object or its main part is placed at these points, then the viewer’s attention will be drawn to it (Fig. 3 and 3a). This division of the frame into rectangles is called the “rule of thirds.” However, not only the points of tension, but also the very lines that divide the frame are centers of perception. The horizon or other semantic lines in the photograph, including those formed by the elements of the composition, should be placed along them (Fig. 4).


3 and 3a. The subject of photography is MOVED in the frame to one of the stress points.
RULE 2.
To add dynamism to a photograph, you can place objects of interest or parts of them along a diagonal line running from one corner of the frame to the other. This line can be anything, for example, a coastline or a line formed by some objects, part or main elements of the composition (Fig. 5).
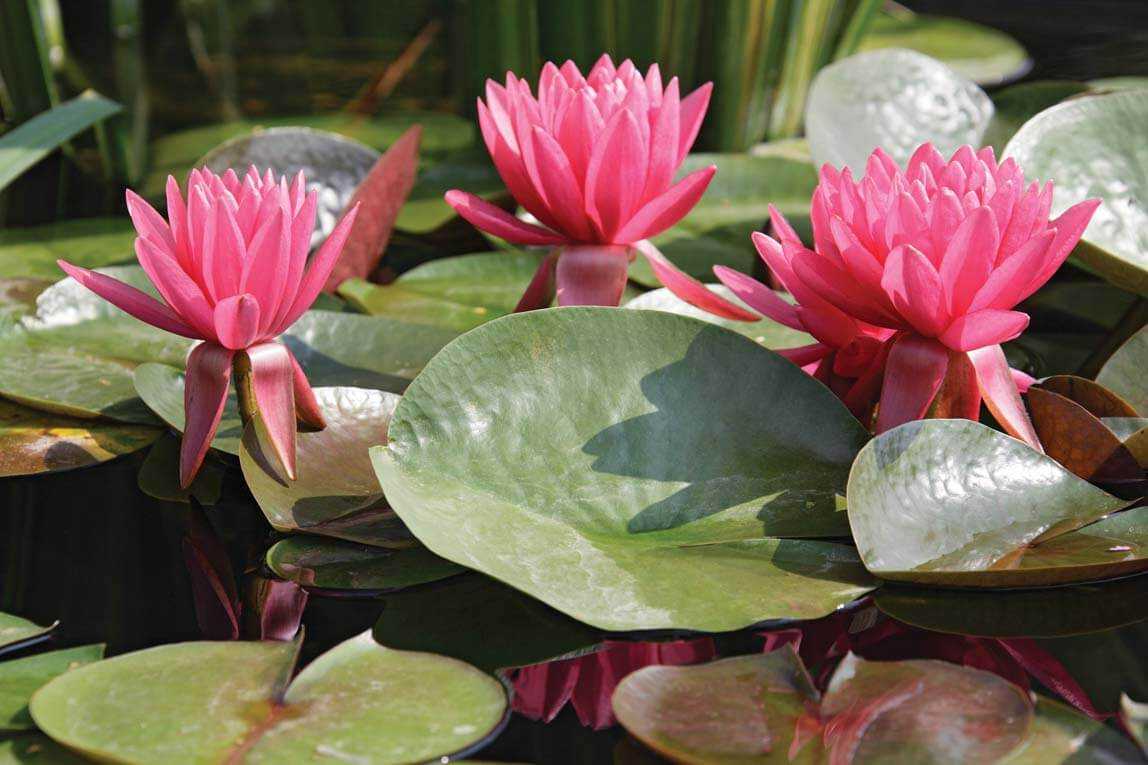

4. Water lilies in the frame are located on one of the LINES – CENTERS OF PERCEPTION.
5. To make the composition of the frame DYNAMIC, the water lilies are placed along a diagonal line.
RULE 3.
Don’t leave too much or too little space around your subject. In these cases, the object will look unnatural. It should occupy 75-80% of the frame.
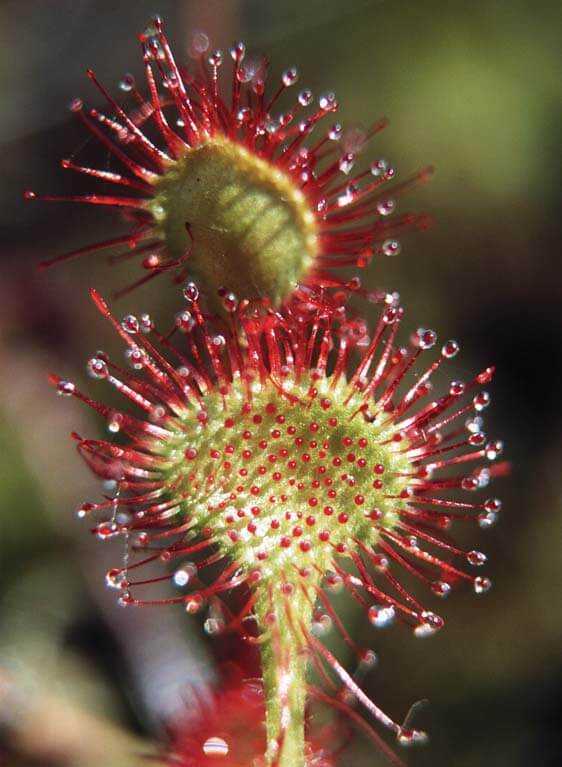
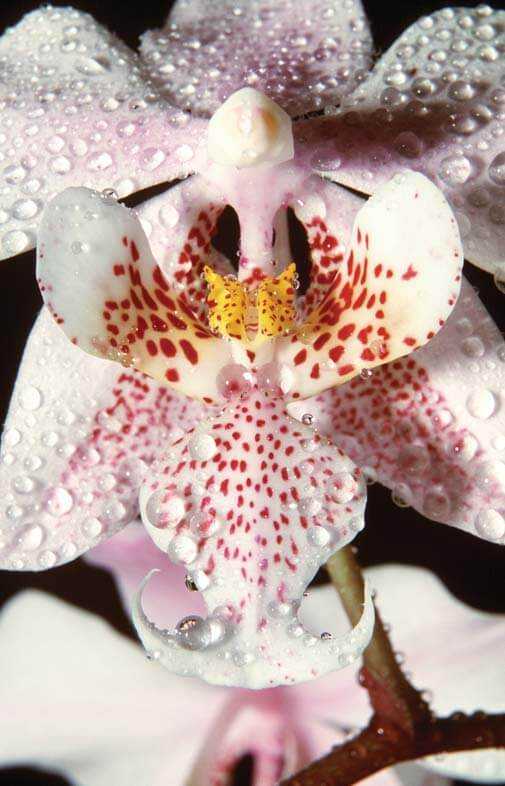
Secrets of macro photography
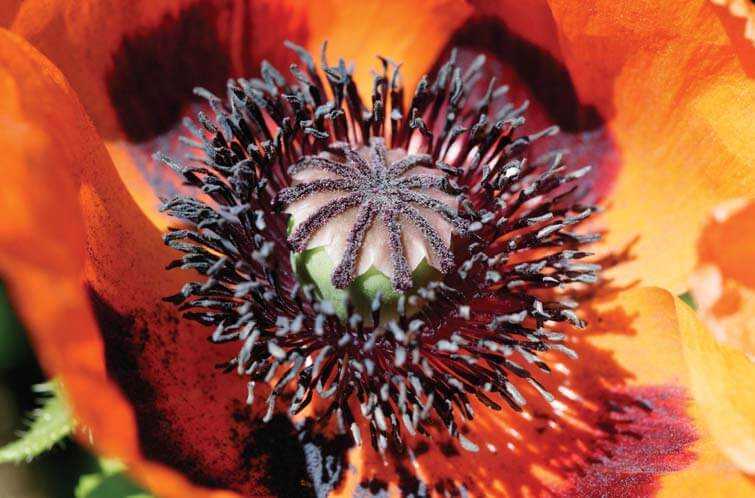
Photos taken in macro mode tend to leave a strong impression. The objects depicted on them are photographed with high magnification, and this is unusual for our perception. But in order for the image to turn out bright and expressive, you need to know some of the features of shooting close-up objects.
Macro photography is shooting small objects or shooting with magnification, that is, at close range. Many cameras and lenses have a macro mode, but, as a rule, it does not allow you to photograph small objects. This kind of photography requires special equipment – macro lenses and special flashes.
The shorter the distance to the object, the more unstable the autofocus is (the camera lens takes a long time to aim at the subject, misses and tries to focus again), so it’s better to use manual focus. When the magnification is very high, it is more convenient to focus by moving the camera back and forth.
The next feature of macro photography is a very shallow depth of field. In order for at least part of the object to be sharp, the aperture should be closed (set to a larger aperture value). This means that a large amount of light is required to illuminate the subject and it is necessary to use a special macro flash or use a reflector.
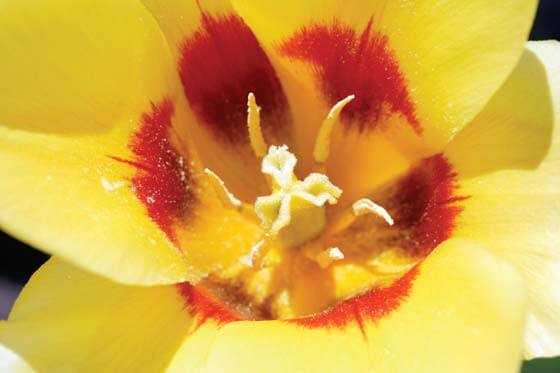
3. Greig’s Tulip “Buttercup”
Why is a reflector needed? Usually the flash is located slightly to the side of the lens and, at such a small distance to the subject, cannot completely illuminate it. The reflector allows you to direct light directly to the subject. It can be a simple sheet of white paper. If there is no additional lighting, then you cannot do without a tripod, since the slightest movement or shaking of the hands will immediately affect the sharpness and blur the image.

How do you know how close you can photograph an object using a particular camera or lens? The macro mode on the camera or lens has its own marking – two numbers separated by a colon. These numbers indicate the ratio of the size of the image of an object on the matrix to its real size. For example, a two-centimeter stamen of a flower on a matrix has a size of 1 cm, which means the macro will be 1:2.
Composition in the interior
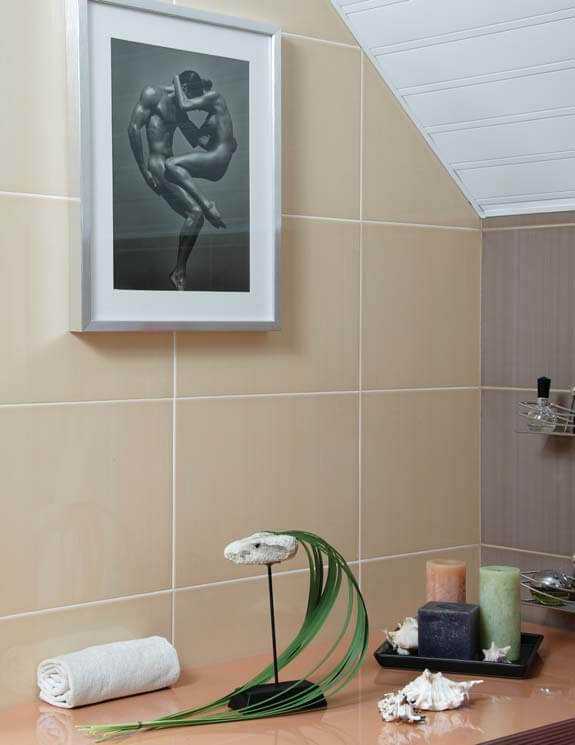
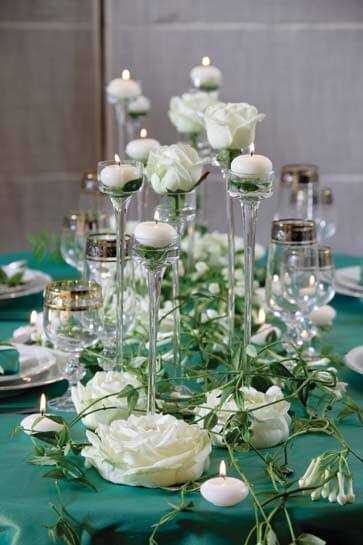
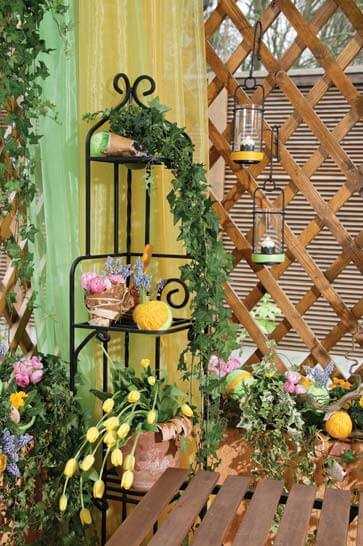
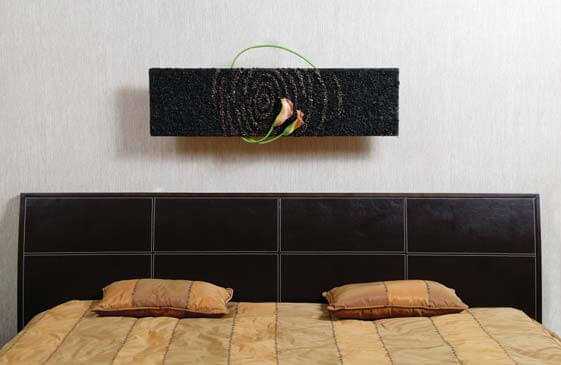
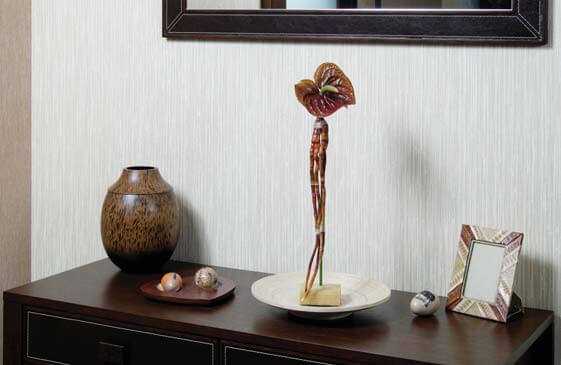
It is better to install lighting for interior compositions, simulating light from a window or chandelier; This is how the human eye is more accustomed to perceiving them. To enhance the feeling of spring or summer, use a hard light (point source, such as a spotlight) as the main light source. For evening compositions, it is better to use illuminators with soft light (a source with a large surface or use a large reflector).
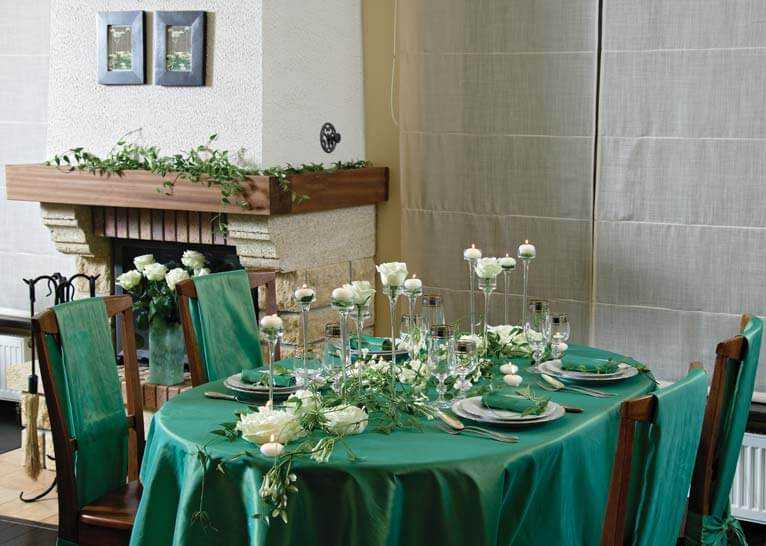
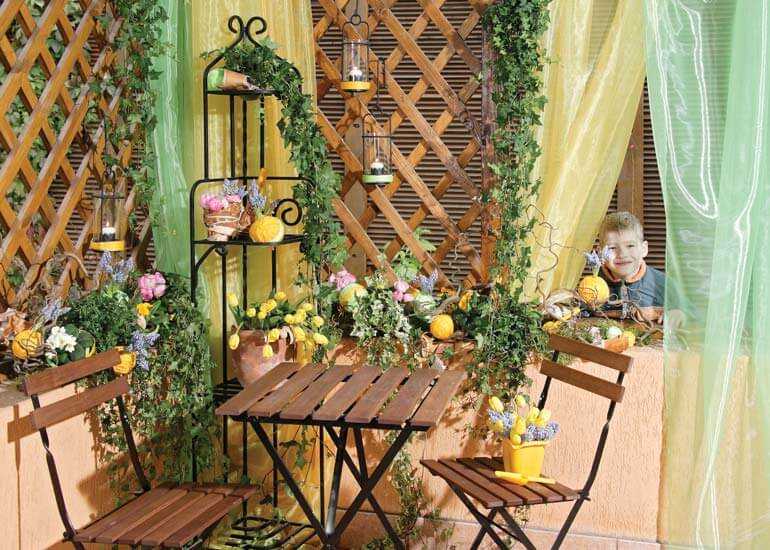
When shooting interior compositions, you should use a minimum number of additional objects. It is only necessary to complement the image, but not to distract attention or distract the viewer from the composition. There is no need to try to fit entire interior items into the frame, such as a table or bedside table with flowers. Only the composition should fit completely. If you need to show some object or interior detail that complements the composition, you should focus on this object by placing it at the “stress point”. The presence of a person or animal can bring a photo to life.
We hope that our tips will help you take unforgettable memories.
Author of the article: Alexey Popov.
Floristry: Anna Tchaikovskaya (“Lady Rosette”).
More interesting articles about paper:
 Расставить знаки препинания, запятые в предложении автоматически. Проверка пунктуации онлайн бесплатно и исправление ошибок. Текстовод
 Как сделать прикольную игольницу из подручных материалов
 Что такое сброшюровать документы
 Специальная крышка для банок с краской или лаком позволит долго хранить состав, аккуратно наливать и перемешивать
 How to make a paper airplane: 12 best patterns
 Печать фотографии на документы
 Гало террариумы
 Бумага Now!Print Gloss 170 г/м2 формат SRA3 (45*32 см) 200 листов