Decoupage for beginners on cardboard: interesting and original ideas
The decoupage technique is quite interesting and original, so it can interest absolutely everyone, especially since there are interesting ideas for beginners.
Beginners are recommended to perform decoupage on small boxes, for example, candy boxes
Decoupage on cardboard can be done using a variety of materials, in particular such as:
Multi-layer napkins are considered the most popular material for decoupage on cardboard. Initially, the required pattern is cut out from the napkin, and then two extra layers are removed. It is somewhat more difficult to work with decoupage cards, since you need to soak the prepared drawing in water so that it absorbs it well, then remove excess moisture with paper towels. Coat the drawing and cardboard with glue and glue it together.
The drawing you like can be printed and also used as decoupage. The finished product needs to be coated with acrylic
varnish so that the design holds more firmly.
Step-by-step instructions for beginners
Before starting the creative process, it is important to prepare the accessories. If you look at the photo above and want to replicate this result, you will need the following:
- Pre-prepared visual compositions (printed images or photographs);
- Regular drinking water;
- Black instant coffee to create an antique effect;
- PVA glue;
- Acrylic varnish.
Once everything is ready, you can get to work in a good mood.
- First of all, moisten the sheets of paper and rub the coffee powder with gentle movements;
- Place them on a smooth surface and wait until they are completely dry;
- Once they are dry, tear them into 5-10 cm pieces;
- Then cut the printed prints.
- Make sure that the cardboard box is not heavily soiled or damaged. If necessary, remove excess.
- Carefully glue each leaf, coat it on top and more intensively along the edges. Then apply the drawings.
- After everything has dried thoroughly, use varnish if desired – this will add shine to your decoupage.
Paintings from cereals – step-by-step instructions with descriptions and photo examples
Description of the decoupage process
How to decoupage a cardboard box with your own hands? When the surface is well prepared (sanded, puttied, corners and edges are reinforced with tape, dents and tears are eliminated), the image is transferred.

It is important to remember: if there are several pictures, you need to choose them in the same topic.

If the design is transferred from a paper napkin, only the top colored layer is used. To ensure that the edges of the picture do not stand out on the overall surface, the image is not cut out, but carefully torn out of the napkin.

The drawing is applied to the surface of the box, and glue or decoupage varnish is applied on top of it (the drawing) with smooth movements with a brush or sponge.

Movements are made from the middle to the edges, carefully smoothing out the folds and removing excess glue. The top of the box can be made without an image, decorated with fabric or lace, and added with beads and ribbons.

After complete drying, the drawing is “revitalized” with acrylic paints. When everything is dry, we fix the work with varnish.

Where and on what printer can I print a picture?
First, let’s talk about printers, because this is the most important and most difficult question in this topic. It is easiest to work with printouts made on a color laser printer. This device does not use ink, but a special chemical powder that does not flow when exposed to water, adhesives and varnishes.
You can also print on inkjet printers with pigment inks (they are also not afraid of water). But printouts made with inkjet printers with water-based inks are afraid of “dampness,” and when working with them you will have to dry the printout and fix the image with a non-aqueous-based varnish. At the same time, no one can guarantee that everything will work out.
If you are seriously interested in decoupage, then the best option is to buy a laser printer (of course, replacing cartridges for such a device is expensive, but if you try, you can find people who will do it efficiently and not very expensively).
Inkjet printers are cheaper, but if you buy them, then only those that work with pigment ink.
You can, of course, find a printer at home with friends or work colleagues, you can go to photo centers and order prints on photo paper (it’s also easy to work with, we’ll talk about paper for prints later), but this is less preferred options: not very convenient for saving time and all your wishes will not always be taken into account.
Decoupage – a non-standard solution to a standard problem
However, in most cases, shoe boxes have a very mediocre appearance, which can hardly be called aesthetically attractive. Over time, the accumulated packaging gives the room the effect of clutter, causing not very pleasant emotions among the owners.
You can correct this situation using ordinary decoupage, decorating objects of different shapes, sizes, colors and textures in the same style.
An ensemble created in this way can become an accent spot in the interior of the room. Photos of decoupage boxes allow you to get ideas for inspiration.
The abundance of various decoupage cards and napkins makes it possible to choose a pattern or even an entire composition, the appearance of which will organically fit into the overall concept. For the kitchen these are drawings with products or flowers. For children’s rooms – images of fairy-tale characters or heroes of your favorite cartoons.
However, if you decorate the box with floral motifs in pastel colors, it will take its rightful place even in a living room or bedroom decorated in a country or shabby chic style.
Decoupage is the simplest way that allows beginning craftsmen who do not have the skills to draw and paint objects to decorate surfaces.
You can decorate not only boxes in this way, but also:
- furniture facades;
- bottles;
- plates;
- cutting boards
Decoupage does not tolerate restrictions and there is room for creative experiments and flights of fancy. Even children can cope with this type of creativity. This means that adults can also take up a new hobby without fear. And perhaps very soon the exciting process of creating paper compositions will turn into a hobby.
Decoupage on cardboard: decorating master class
There are absolutely no boundaries in decoupage. The most important thing is imagination. Turn on your imagination and new possibilities for exquisite design will open up for you. For example, purchase fabric materials, textured waterproof wallpaper and self-adhesive film. Remember that today the assortment is very large!
Moreover, nothing prevents you from connecting your child, who will be able to independently color a future gift for grandparents, friends, teachers, anyone you wish. All you need for this is plain paper, paint, glue or a glue stick.
1. Cover the box well with monotone paper so that there are no gaps or gaps.
2. Ask your children to arm themselves with brushes and paint in any possible way as they want. You can also dip your child’s hands in paint and leave handprints; you can simply offer to draw little people or various animals, or write the names of loved ones.
3. Adding acrylic varnish will add shine.
Decoupage on eggshells
This method requires accuracy and patience from the performer. But the result is worth it. After a lot of painstaking work, we get an exclusive version worthy of the most famous designers.

Acrylic paint is applied to the surface to be decorated, then putty is applied. Each layer must dry well.

After this, carefully, slowly, using PVA glue, apply eggshells and, again, PVA glue. And only then – the selected image. Use a brush to pass over the design from the middle to the edges, expelling air and excess glue.

Acrylic paints can be used to paint along the edges and contours of the design to give it more expressiveness. After drying, the surface is varnished.

Using eggshells
allows you to achieve three-dimensionality of the image.

Decoupage with fabric
For this method, dimensions are first taken from the box. Based on the measurements taken, a pattern is drawn up taking into account hem allowances. The hem is done to prevent the raw edges of the fabric from unraveling.

All pattern pieces are cut out of fabric, ironed well, and seam allowances are pressed inward. Apply glue to the box and fabric. Glue the parts, carefully smoothing the fabric towards the edge from the center.

Waiting for it to dry completely. After this, the decor can be supplemented with lace, buttons, beads, etc.

Tools and materials for decoupage.
- Cardboard box.
- Acrylic varnish.
- Brush or sponge.
- Scissors.
- PVA glue.
- Acrylic paints.
- Sandpaper.
- Masking tape.
- Napkins, fabric, beads, lace, etc.
- Eggshell.
DIY cardboard toys
Every child will be delighted that he himself made a decoration for the Christmas tree. Children love to do decoupage from a very young age. In this case, herbal compositions are used. Instead of a primer, a thick solution of gelatin is used, and instead of glue, gelatin or egg white is used.
So, let’s make a bird. We cut out the profile contour and the wing. We prime both parts. Let’s dry it. Then the outline is pasted over with colored toilet paper or napkins in a small pattern. You can make an eye for the bird, sprinkle glitter or confectionery powder on its tail and wings. The two parts of the circuit are held together by thickening gelatin.
Older children can use a safety glue stick. In this case, a layer of glue is applied to the cardboard, the design is stuck on top, the surface is strengthened with gelatin or egg yolk, you can treat the finished toy with hairspray, cover it in 3-4 layers.
Fastening is done simply: a hole is cut at the top, it is better to use a hole punch, and a braid or thin ribbon is pulled into it.
Interesting examples
With the help of decoupage boxes you can easily revive any interior or change things that have become familiar. All kinds of boxes for spices, baked goods or sweets will help create a cozy atmosphere in the kitchen. Using things made with your own hands is certainly more pleasant.
In any home, the issue of storing things is acute. First of all, this applies to all sorts of little things (keys, chargers). Once you put them in beautiful boxes, the situation will become more neat.
Round boxes look the most elegant.
But when it comes to the internal organization of cabinets, you should give preference to square or rectangular ones – they are more ergonomic and spacious.
Even hidden behind doors, an elegant box can quickly lift your mood.
Decoupage can radically transform any, even outwardly nondescript, box.
Decorated in this way, they can not only become an alternative to gift wrapping, but also act as an independent gift. A jewelry box is perfect for the fair half of humanity. For an office worker or student – a box for stationery. And any craftswoman will be glad to have a convenient container for her needlework.
How to glue a decoupage card. we do it correctly | crafts fair magazine
My customers often ask: “How do you do this?” Well, I show and tell.
We will glue a thin decoupage card, in our case, made by Impressio (all stages are completely suitable for pre-thinned laser prints).
( Why a decoupage card: recently, at the Masters Fair, I came across a master class on gluing a decoupage card. And from the controversy in the comments, I realized that such a fairly simple operation seems mysterious and incomprehensible to many beginners. So today we will fill the knowledge gap
).
Stage 1. Surface preparation.
1) Initial surface – wood, plywood
.
Grinding, elimination of defects.
Depending on the quality of the surface (there are workpieces that do not require pre-grinding), we select the grit of sandpaper or sponge. I use from 150 to 400. If there are chips or dents, we putty with acrylic structural paste or wood putty.
![]()
Often there are small voids at the ends of plywood blanks – a section of the glued layer of wood veneer has been torn out (or it has crumbled when cutting the plywood).
We proceed as follows: coat this hole with PVA glue with a thin brush and fill it with putty mixed with PVA. This way the putty will stick better. After sanding, we naturally remove all dust from the base.
(Life hack: dust can be easily removed from the inner corners with a vacuum cleaner).
Primer
.
Be sure to prime the surface!
Primer provides much better (compared to paint) adhesion of paint layers to the surface. The primer will “close the pores” of the wooden base and will not allow the plywood to strongly absorb the decoupage glue. Accordingly, the tree will not “swell” much, and then become deformed. This is especially true for thin plywood: if you wet it heavily with water-based materials and then dry it intensively (on a radiator, using a hairdryer), it will inevitably move/deform.
We use wood primer, art primer, and universal primer. I apply the first layer of primer either with a fairly elastic flat brush or foam rubber, carefully rubbing it over the surface.
![]()
If you do not need “solid painting”, but want to preserve (show) the texture of the wood, then you can use white (or other light) glaze impregnation for wood. It may be called “decorative and protective impregnation for wood” and have in the description the text “glaze impregnation, water-based, for protecting wood surfaces.” It is translucent and emphasizes the natural texture of the wood.
Since the first layer of primer turns out to be very thin, I prime it a second time – this time with a roller, so it turns out much smoother and faster.
Dry the primed workpiece for as long as indicated in the instructions for the primer. No need to “speed up the process” with a hairdryer! The soil is our very “first row of bricks” in the building – our decoupage work. Can you imagine what will happen to a building where the bottom row of bricks remains damp and unfired? Same thing.
Grinding.
Yes, that’s right, polishing again. Why? Watery soil will lift up all the fine hairs on the wood and especially on the plywood (since the wood will absorb water). You will be surprised at their number when you hold the work up to the light at eye level. Just some kind of porcupine! And if we don’t “shave” it with an abrasive, then making our surface perfectly smooth will be oh so difficult; we will need many, many layers of varnish (and a lot of sandpaper) and our labor. Why should we complicate our lives?
Paint white
( or
other light
– according to our idea and the color of the background of the work) with acrylic paint
.
![]()
Why is paint needed, but the primer is white? At the very least, it is more pleasant and convenient to apply to paint, it is tactilely smoother (the primer sometimes remains a little sticky, especially the primer for fabric-leather), and the card glides quite well on it (you can move it while sticking). If the card does not cover the entire primed surface, then dust and lint will settle on the open ground during the drying process of the glued card. It is much more difficult to remove them from soil than from paint precisely because of its strong adhesion.
(I find it more convenient to paint with either a piece of sponge or a roller).
Let’s dry it. If necessary – there are drips, fluff, brush marks – we sand it.
2) If the original surface is metal (galvanized or enameled), glass.
We do not sand the surface! We just thoroughly degrease it and coat it with a special primer – universal, for complex surfaces, a good primer is Otex from Tikkuril: it goes on smoothly and dries quickly. Intermediate sanding – if necessary, no need to cover with white paint – the surface is good without it. You can also use automotive spray primer; it will lie flat and neat.
I deliberately do not describe the treatment of MDF and leather surfaces. I don’t like M DF, I use it extremely rarely (therefore I don’t have much experience to advise you as a guide). I can only give recommendations: first prime with a couple of layers of acrylic varnish so that the MDF does not absorb the primer like a sponge. A couple layers, and then primed like plywood. And there is an absolutely wonderful master class on gluing decoupage cards (more precisely, printouts) to the skin here (by Anastasia Gella) – I don’t want to repeat myself. Some nuances for different surfaces – see my “Life hacks in decoupage. Part 2”.
Stage 2. Glue the card
(or only part of it).
I don’t soak thin decoupage cards. I do it a little differently: I lay out the file, spray water on it from a spray bottle or walk over it a little with a brush dipped in diluted decoupage glue. Now I place the card face down (!) on the file. I wet it with water from a spray bottle so that it gets all wet.
![]()
(in the right photo you can see how the card gradually becomes dark and transparent from the water – it should get wet all over, we don’t spare water)
Now I coat the entire surface of the workpiece with decoupage glue. A thin but visible layer of glue without puddles or bald spots. You need good glue, there is a special one – for decoupage cards and borders. I really like glue-varnishes: glue that combines the properties of both glue and varnish, for example Mod Podge (expensive, but very economical), Varnish (Glue) for decoupage from Tair (inexpensive, but the consumption is much higher), glue- decoupage varnish from Marabu or Hungarian glue varnish from “Love2Art” (the most inexpensive).
![]()
I blot the decoupage card with a white paper napkin or paper towel. This way I remove excess water. After all, the less water, the faster the layers will dry (in the right photo on the map you can see the difference – where I blotted it with a napkin)
I lift the file with the card by the corners and turn it over (since we first applied water or glue to the file, this will hold the card on the file and it will not fall down at the most crucial moment). I position the card in the right place, a couple of centimeters above the workpiece. I lower the card onto the surface in the center and smoothly lower the edges of the file (the card lies from the center to the edges). I smooth the card through the file with the edge of my palm in the same way – from the center to the edges (you can do this with a piece of cloth or napkin – it will be better to slide over the file this way). Then you can press the card more tightly with a rubber roller or rubber spatula.
![]()
Now, carefully, at one of the corners convenient for us, remove the file from the card. If the corner of the card begins to rise, then smooth it (press it) to the surface with your fingers.
Important! Some files are not suitable for these operations. For example, thick and rough files from Erich Krause: cards “cling” to them very strongly precisely because of the rough surface.
I coat the top of the card with decoupage glue. If the card is larger than our surface or in some places “hangs” from the base, carefully tear off the excess.
Drying it. For a long time, without a hairdryer (as a rule, I leave the work to dry overnight. That’s why I set the completion time to “one day”
).
Why without intensive drying? The fact is that a card is a kind of “bun with a crispy crust”: the bottom is just a paper layer (crumb) and a layer with a printed image (crust). What absorbs water more, what is more permeable – the crust or the crumb? If we dry the card with a hairdryer, we will quickly dry the top, thicker layer of paper, sealing the lower, still wet layer. But moisture will still come to the surface, over time or during the next intensive drying. And very ugly bubbles will appear on our map. It will be very difficult to fix this.
Our map is glued, we can continue to “conjure” our work – according to our taste and desire.
I will be glad if my advice is useful to beginning decoupage artists.
Irene.
How to make decoupage with printing on office paper. | crafts fair magazine
It’s no secret that the use of printouts in decoupage is very popular. The motifs of decoupage napkins do not always correspond to our idea. Either the colors don’t really suit our work, or the sizes of the motifs on the napkin don’t match the workpiece. I am designing and printing decoupage cards on office paper. There is paper in A-4, A-3 format, and there is paper 60 cm wide (the maximum size of a picture for the width of the paper is 58 cm) and as long as needed. Colors are vibrant and images are clear. Paints do not flow (tested personally). The paper thins perfectly both dry and wet. They are perfectly implanted using the face-to-acrylic method.
My customers, especially beginners who are just starting to master this wonderful type of creativity – decoupage, have many questions about how to make decoupage with a printout on office paper. In this regard, I decided to post here three video lessons from the famous decoupage master Anna Turchina, in which she explains in detail how to work with printouts on office paper.
Video master class on decoupage “Delamination of office paper”. In this lesson, Anna Turchina tells you how to thin out a printout on office paper in a couple of minutes.
Video master class on decoupage “Gluing up office paper.” In this lesson, Anna Turchina shows you how to paste a thinned printout.
Video master class on decoupage “Implanting printouts”. In this lesson, Anna Turchina tells how to make decoupage using the method of implanting a printout.
I hope that watching these video tutorials will solve all your questions about working with printouts for decoupage on office paper. Good luck and creative inspiration to everyone!!!
Lucky.
Separately, we need to talk about varnishes that can be used to protect the printout before thinning.
Stores sell special transfer products called transfer gels or transcryls (suitable for prints made with non-aqueous inks).
They are elastic and do not break, do not tear when wet, are used according to the instructions: the image is covered with transcryl in several layers, dried, then soaked and the film with the image is separated from the paper.
However, if transcryl is applied in a thin layer, it will stretch very strongly when the paper is separated, and the image will be deformed. Therefore, I prefer to use slightly less elastic construction varnishes.
To understand whether any varnish is suitable for protecting an image, you just need to try it in action: thin out any image by first covering it with this varnish in several layers. If the varnish film breaks when wet and rolled, then this varnish is not suitable for thinning.
If the varnish stretches very much, then our image will stretch along with it, and it will be inconvenient to work, because due to the stretched varnish you will get a lot of folds: you need it to stretch, but in moderation. By the way, during my experiments, it turned out that most artistic and construction varnishes are quite suitable for the thinning procedure.
Let me draw your attention to the fact that using the described methods you can thin out not only printouts, but also thick decoupage cards, pictures from magazines and photographs!
As you can see, working with printouts is not so difficult: the main thing is not to be afraid, but to try. I wish every beginner (and not only) decoupage artist to master the technique of working with prints and expand their capabilities, get new sources of inspiration!
New application
Why buy an organizer when you can use the shoebox decoupage technique? What can’t fit in the new storage: writing instruments, spices and seasonings, paper, both clean and with some very necessary information!
- You need to remove the lid from the box, find the center of the long sides, make a cut at an angle and bend it.
- In order for the fold to come out even, you should draw a line with a pencil along the ruler, draw along it with scissors, and then bend it. This will create the central wall of a double organizer.
- The second part of the organizer is organized in the same way. Both parts can be different in size depending on the purpose.
- The sides should be glued together, and the inside should be covered with soft cloth or paper of the selected color.
- The outside of the box needs to be primed in 3 layers, just like any other decoupage box.
Eggshells can be used in the next step. Quite original and very affordable decorative material. Such a decoupage style box will look interesting and correspond to zero waste trends.
Shell preparation:
- Wash with detergent,
- Remove film,
- Divide into small pieces.
Apply glue to one of the walls of the box and attach the pieces. To consolidate the result, you can apply a layer of glue on top of the shell and wait until it dries completely.
You can apply a drawing to other walls using the simplest and most accessible method:
- Because. The box is already primed, all that remains is to apply glue. It is advisable to use decoupage glue or PVA. The use of silicone glue should be avoided.
- If you plan to use a napkin for decoupage, you need to separate the top layer.
- Place multicolor on top and iron until air bubbles and folds under the pattern disappear.
- Repeat on all sides of the box you plan to decorate on.
- You can separately work on the corners and folds to give them an antique effect.
- Add decor from beads, ribbons, buttons, if this was the original idea.
- Apply 3 layers of decoupage varnish or parquet varnish.
- The decoupage style box is ready!
- To achieve an antique effect, you need to paint the edges of the box in a dark color.
- You can apply the dye using a sponge, gently tapping it into the box to get a unique and very realistic image.
- Applying a small amount of patina will have the same effect. After the manipulations, success needs to be secured with varnish!
The box decoupage master class has come to an end. Note: a photograph of your loved one is also suitable for this technique, forward to new achievements!
Preparing cardboard for work
Decoupage of a box made of cardboard begins with preparing the surface.
In order to prevent the box from “floating” from glue and water-based paints during the process of gluing pictures, it is necessary to make a kind of protection from moisture. Then the paper container will last for many years. If the walls are slightly dented, the shape is restored with an iron.
It is more convenient to iron boxes from the inside.
Primer compositions:
An excellent smooth surface is obtained after applying a layer of gypsum. It must be diluted in small portions – it hardens in a minute. The consistency should be as thick as possible – the plaster should spread like thick jam. Be especially careful when covering the corners with primer.
Apply paste-like plaster with a dry piece of foam rubber or a wide paint brush. A hairdryer will speed up the drying process. Instead of plaster, acrylic wood primer is used to protect the cardboard before decoupage. It is applied with a flat spatula or narrow spatula. Dries 2-3 hours outdoors at room temperature.
It is possible to prime the cardboard with universal PVA glue; it is thick, white, and does not become transparent when cured.
The clerical “brother” is not suitable for protection. It is better to use a freshly opened package of PVA; the glue should not be dry or with lumps. In the absence of a primer, glue, or plaster, thick cardboard is immediately coated with acrylic paint. The first minimum thin layer should be thin.
After drying, the surface is coated again and again. Make up to five layers. This significantly increases paint consumption. Make sure to dry the box every time, otherwise the paint will start to clump.
Examples of decoupage on cardboard (photo)
Similar articles
- Crafts from papier-mâché: do-it-yourself, products, photos for beginners, animals, video, how to make for kindergarten, large ones for the garden from mass
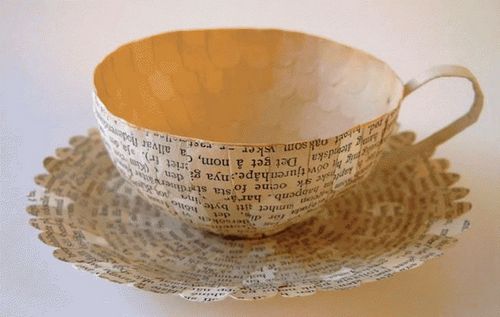
The papier-mâché technique helps create magnificent hand-made crafts. Papier-mâché is a simple and cheap technology that allows you to create.
- Papier-mâché fruits: do-it-yourself mk, how to make from fruits, master class, vegetables, vases, equipment, for the kitchen, photo, video
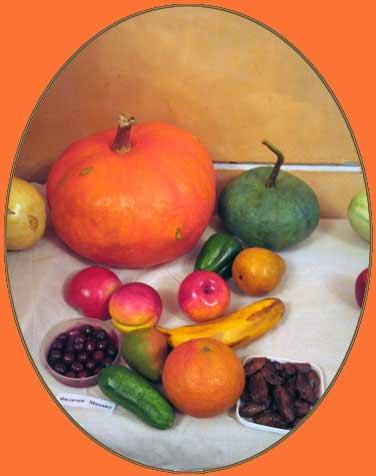
Fruits made from papier-mâché will become an original decoration for your kitchen. Papier-mâché translated from French means chewed paper. But how wonderful.
- Decoupage of a chest: old photos, antique with your own hands, master class on a wooden box, what kind of wallpaper
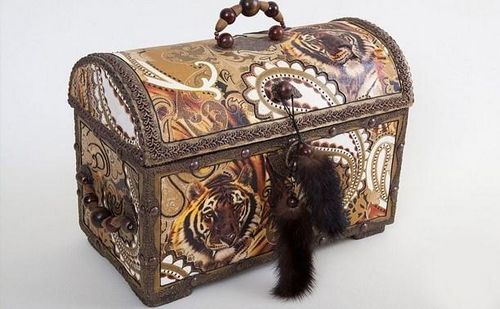
Decoupage of a chest is a very entertaining and interesting process. Over the past few years, decoupage has become a favorite type of decoration for thousands of needlewomen. AND.
Products for decoupage paper buy in the Leonardo online store

§
§
More interesting articles about paper:
 Объемные поделки из бумаги – 135 фото поделок и видео мастер-класс как сделать поделку
 Как переплести журнал | Авторская платформа
 Как оформить интерьер однокомнатной квартиры: 47 классных идей
 Как сделать фото 3 на 4 в Word
 Справочник полиграфических форматов бумаги
 Металбинд – уникальный переплет металлическим каналом
 How many sheets can I staple for the tax office? – Legal assistance
 История создания бумаги